Picture using one-shots from a vintage drum machine (Linn Drum, Roland TR-707, Oberheim DMX) or any sample pack. They often sound cool but might lack that in-your-face punch you want.
🥁 Start with clean layers:
Check that your base samples aren’t too muddy or lo-fi. If they feel weak, try layering:
1-) Add a snare tail for extra body.
2-) Stack a second snare with its low end and attack cut to add texture without clutter.
Once the layers sound balanced, send everything to a drum bus for unified processing.
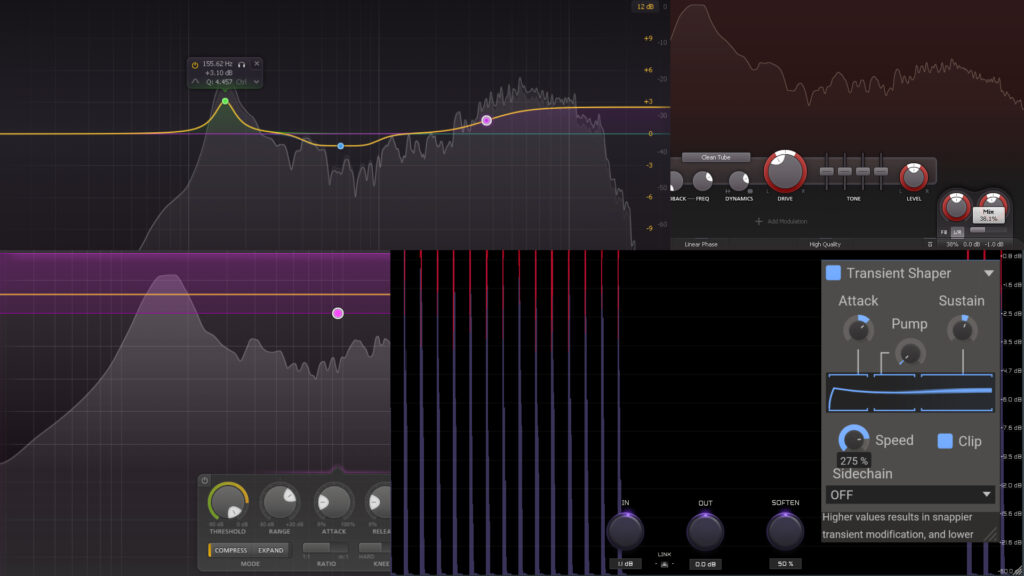
✨ Here’s the chain I typically use:
1-) EQ – Gentle boost on the fundamental frequency of your kick or snare so it cuts better.
2-) Parallel Saturation – Adds harmonics and color to make clean samples feel alive.
3-) Parallel Upward Compression – Brings out quieter details without squashing dynamics.
4-) Clipper – Controls peaks while keeping transients strong.
5-) Transient Shaper – Accentuates the attack for that final punch. (keep the “Clip” knob enabled)
🧰 Plugins I often use:
- Kilohearts Transient Shaper (free) – simple and effective.
- Kazrog KClip Zero (free) – great for balancing soft/hard clipping.
- Any stock EQ works fine.
- Saturation: iZotope Trash or FabFilter Saturn 2 if you want more options.
- Compression: Your DAW’s stock compressor, or FabFilter Pro-MB / OTT for more control.
- Sausage Fattener by Dada Life for extra sauce on the drumbus (only use it with small values like 2%)
💡 Extra tips:
- For snares, a 50/50 soft/hard clipping setting keeps the transient punchy but controlled.
- For kicks, I usually prefer a limiter instead of a clipper to maintain clean, undistorted low end.